Can I Install A Reverse Osmosis System Myself?

Reverse-osmosis water filters can be a great investment if you have a lot of bottled water. These filters can produce 10 to 20 gallons of water per day. Reverse osmosis systems cost between $150 and $300. In addition, there are $100 to $200 annual replacement filters.
Many chemicals and pollutants are removed by reverse-osmosis filters. They separate the water from them and flush them down the drain line. The purified water then goes to the storage tank. Reverse-osmosis filters do not remove minerals that give water its flavor. You can try a gallon of water (found in most supermarkets) before you buy a system.
Install A Reverse Osmosis System
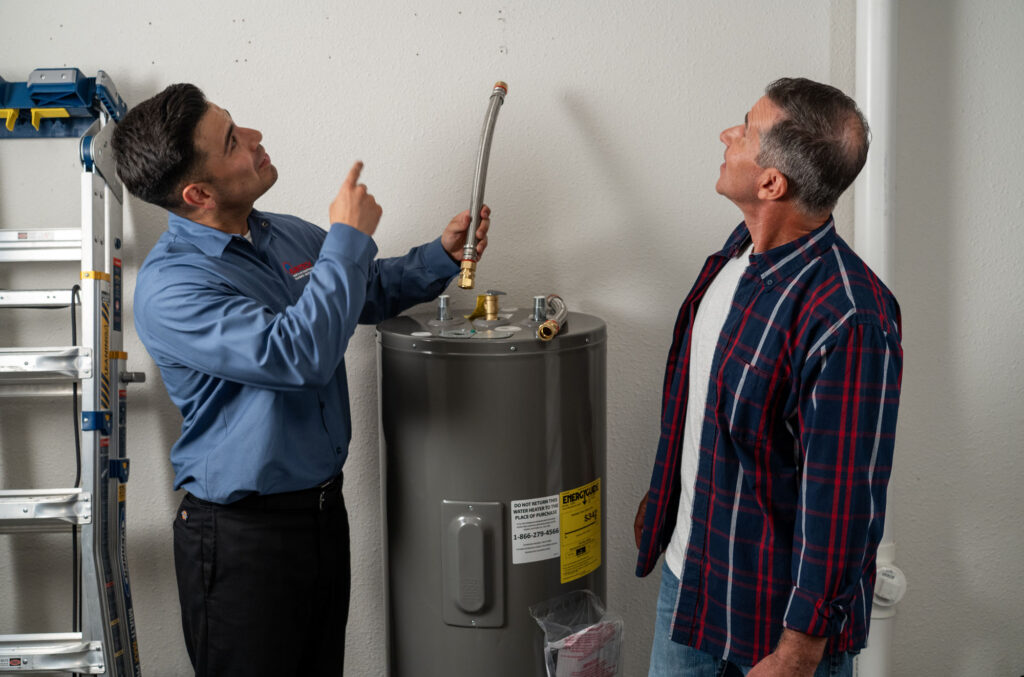
Hang the filter assembly at the specified height on the back wall or sidewall of the sink base. After turning off the hot and cold water shutoffs, turn on the tee/saddle valves.
Cut the color-coded water supply lines so they are above the cabinet base. It won’t get kinked. Attach the plastic tubing to your supply valve.
To eliminate excess tubing, reduce the supply and waste lines from the faucet. However, don’t cut into the larger black waste line. Attach the lines to fittings at the base of your faucet. To keep the black waste lines from clogging the faucet’s base, they must be connected to the supply.
Attach the faucet to your sink. Next, install the drain line adapter underneath the sink basket. The waste line should flow downhill without loops.
Place the storage tank and connect the last water line. Fill the system as per the manufacturer’s instructions.
Recharge A Holding Tank For Reverse Osmosis
Your reverse osmosis system may not be delivering as much water after it is fully charged. The traditional tire valve-style stem of the tank can lose air over time. The bladder won’t be able to push as much water if the pressure drops.
Here are some ways to check your pressure. You will first need a low-pressure tire gauge. The Tire Gauge Lower Pressure 1 to 20 PSI is available at Amazon.com for $6 An ordinary tire gauge is not suitable. Next, shut off the water supply valve for the filter system. Finally, close the valve at top of the holding tank. The tubing connecting to the tank valve should be disconnected. Get rid of all water from the tank. Next, check the air pressure. Adjust the pressure to the recommended setting. Turn on the water and then reinstall the tubing and tank.
Note the pressure in the tank once it is full. You can check the pressure again after a few days. You’re done if the pressure remains the same. You can replace the core of the valve at your local auto parts store if the tank has lost pressure. If that doesn’t resolve the problem, you should replace the tank.
This Project Requires the Use of Certain Tools
You’ll save time, frustration, and money by having all the tools you need for your DIY project in one place.
- 4-in-1 screwdriver
- Adjustable wrench
- Utility knife
This project requires the following materials
Don’t make last-minute purchases by having all the materials you need to be prepared ahead of time. Here is a list.
- low-pressure tire gauge
- The reverse osmosis filter system
This post was written by a water treatment expert at Pure Blue H2O. At Pure Blue H2O we are the providers of the best 3 stage reverse osmosis system! We know that the best product comes from the best materials. They offer whole home water solutions such as reverse osmosis systems, shower head filtration, filter replacements, and a variety of similar products. Their focus is to provide Americans with safe and clean water throughout the home.